You recall my post about my rock polishing hobby workbench, where I built the wall I needed. Today’s post is about the light fixture I built to shine light on my projects. Read on for the details!
The building of the light fixture:
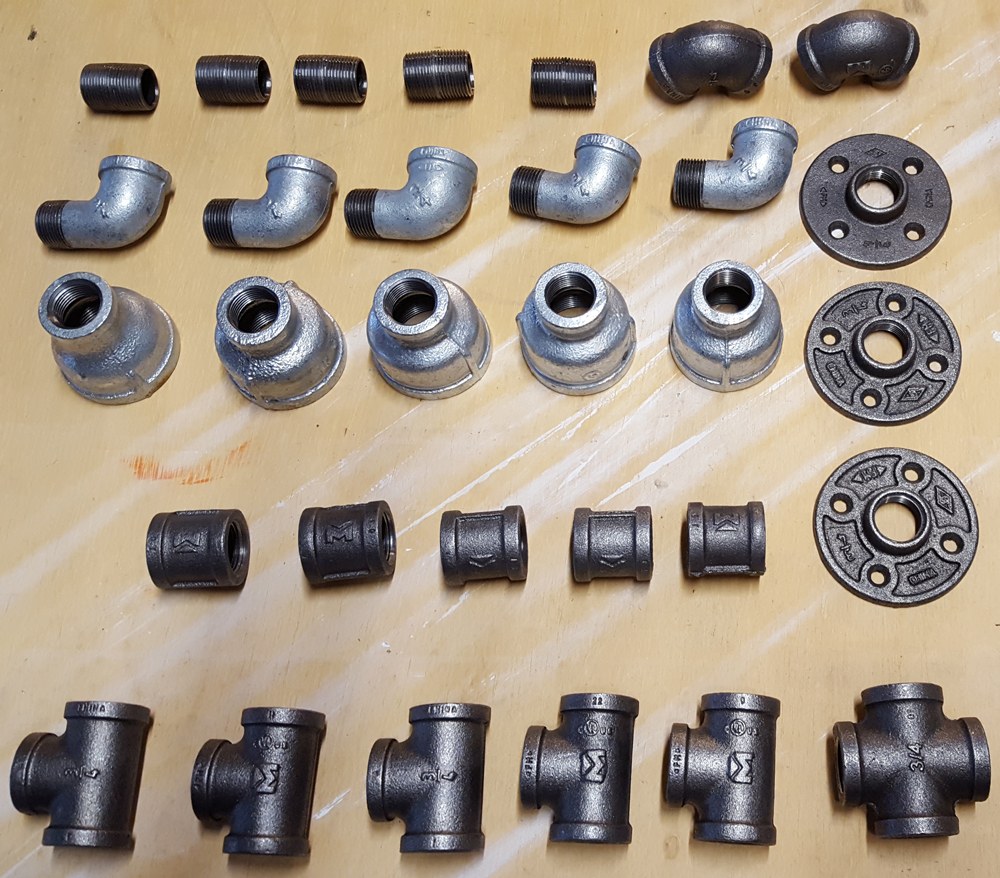
I like the look of some of the industrial fixtures I’ve seen, so I decided to make my light from metal piping and paint it black. Here are the fittings I started with:
I had to work out the dimensions before I bought the piping, how the fixture would mount to the wall, and where the wires had to end to ensure I could get power to the lights. I also wanted to have the fixture wired to a switch to make it easy to turn on and off. All of that went into the design. I assembled it, wired each socket, and ran the wires for power.
After getting it assembled and the wires pulled, I wired it temporarily in my garage so I could test it. Guess what? It worked!

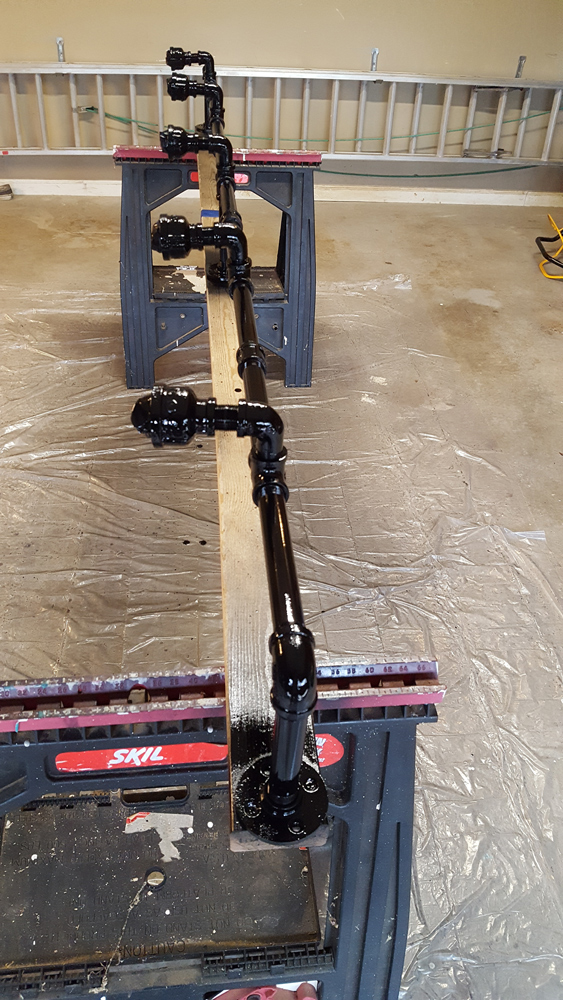
I mounted it to a 2X4 so I could paint it. It kept the fixture upright so I could get all sides of it painted. I also made sure to put tape over the sockets to keep paint out of them. I think it turned out nicely.
Installation:
Mounting it on the wall was a little awkward given the length of it, but I used a couple of 2X4s to hold it at approximately the height I wanted, then loosely screwed it into the studs on one end and in the middle. I ran the wires through the wall and then tightened everything and removed the 2X4 supports.
When I had the electricians wire the wall, I asked them to put a wire from the switch to a junction box for me to connect the fixture. I made sure I turned off the breaker (safety first!) before I wired it. I pulled the fixtures wires into the junction box and connected them to the power wire the electricians left me. Once I had it wired and the junction box cover installed, I closed the breaker and flipped the switch and there was light!
The finished product:
I added some Edison light bulbs in keeping with the steampunk-inspired industrial look, and left the air ducts, AC coolant lines, and joists exposed to add to the look. I like the way it turned out and it gives me 300 watts of light over the workbench. Seems like a lot, but since the workbench will be ten feet long, a lot of light is needed.

What do you think? Connect with me on social media and let me know. I’m on Twitter, Facebook, Goodreads, and Pinterest. You can also email me at bill@williamlstuart.com.
Leave a Reply